Got a text... from my boy!!! He wants to pop in for dinner!!! Happy Gremlin Mom!!

So, for those of you who are exhausted... chasing after a mess of kids, while working, and taking care of a household... this might seem crazy (and I get it, that's my life too)... but when your kids grow into "man-boys" with all of their "college", and "work", and "livin'-on-their-own"... a call like this makes your heart explode!!

So, I'm not sure I even have enough food in my house... on a Friday to cook dinner... but, IT'S ON!!! The boy's comin' for some din... let's see what I got.
Knowing my favorite thing in the whole world is having my boys pop in for dinner, I always have certain things on hand, and a 1 pound bag of frozen shrimp is one of them!

So tonight, we'll have shrimp pasta with what ever veggies I have!! It's easy, quick, and high in protein! So tonight, I thawed a bag of frozen shrimp in cold water (changing the water a couple of times). This takes about 30-40 minutes.

While the shrimp thaws, I started my sauce! Another thing I always have on hand are canned tomatoes, St. Marzano are the best, but you can use whatever you have.

And if you tend to buy tomato sauce, instead of tomatoes, use that! Now, I don't want to freak you out, but I started with some garlic. OK, so...maybe more than a few cloves... I sorta added about 7 cloves of chopped garlic and 1 teaspoon of crushed red pepper flakes to a pan with some olive oil.

Sounds like a lot, but we like a lot of flavor. For some people, 2-3 cloves of garlic and a pinch of red pepper flakes may due. We're kinda like flavor Vikings...flavor warriors, of sorts, a little over the top... and that's the way we like it. So, drop the garlic and red pepper flakes in the pan, and let it bloom over medium low heat for about a minute. You do not want to burn the garlic, just let it get warm and cozy in all that tasty olive oil and red pepper.

Next, I dropped my tomatoes into the pan with 1 teaspoon of kosher salt and fresh ground pepper and half a teaspoon of sugar. Mix it all together and smash the tomatoes with the back of your spoon.

Let the tomatoes cook in that garlicky-peppery hot tub of flavor(about 30-40 minutes on low heat). While the shrimp thaws, you can get the veggies ready.

Tonight, I actually had fresh broccoli and zucchini... on a Friday... SCORE!! So, we washed and chopped our veggies. As the sauce continues to cook, shell the shrimp and dry it with paper towels and add to a bowl.

To flavor-up the shrimp, I added about 2 teaspoons of olive oil, salt and pepper, 1 teaspoon of Italian seasoning, and... yup... another 2 cloves of chopped garlic. Mix together and park that marinating shrimp on the counter for about 30 minutes to develop the flavor!

After the shrimp soaks in all that garlicky flavor, add it to the sauce that you've been cooking. Turn the heat up from low t medium and cook just until the shrimp is pink and the edges curl a bit. Don't overcook or the shrimp will be tough. This will only take a few minutes.

Cook your pasta according to the package directions. We used plain old thin spaghetti, and it was perfect! I added my veggies to the pasta while it cooked for the last minute of cooking. This way you get them slightly cooked, but still crisp, fresh and full of nutrition. Strain the pasta and the veggies and add to the sauce and shrimp.

Toss together to coat the pasta and combine all the ingredients! Your house officially smells like an Italian trattoria, and you're about to have a "come to Jesus" moment with a bowl full of garlicky shrimp pasta!!!

So, here's dinner Joe's way... a big bowl of shrimp pasta full of healthy veggies and topped with some grated cheese! Full of flavor and super hearty and very lean! One happy Gremlin Mom with both... a big-grown man-boy, and middle school boy... in the house... for dinner tonight!! I'll take it!
 So, for those of you who are exhausted... chasing after a mess of kids, while working, and taking care of a household... this might seem crazy (and I get it, that's my life too)... but when your kids grow into "man-boys" with all of their "college", and "work", and "livin'-on-their-own"... a call like this makes your heart explode!!
 So, I'm not sure I even have enough food in my house... on a Friday to cook dinner... but, IT'S ON!!! The boy's comin' for some din... let's see what I got.
Knowing my favorite thing in the whole world is having my boys pop in for dinner, I always have certain things on hand, and a 1 pound bag of frozen shrimp is one of them!
 So tonight, we'll have shrimp pasta with what ever veggies I have!! It's easy, quick, and high in protein! So tonight, I thawed a bag of frozen shrimp in cold water (changing the water a couple of times). This takes about 30-40 minutes.
 While the shrimp thaws, I started my sauce! Another thing I always have on hand are canned tomatoes, St. Marzano are the best, but you can use whatever you have.
 And if you tend to buy tomato sauce, instead of tomatoes, use that! Now, I don't want to freak you out, but I started with some garlic. OK, so...maybe more than a few cloves... I sorta added about 7 cloves of chopped garlic and 1 teaspoon of crushed red pepper flakes to a pan with some olive oil.
 Sounds like a lot, but we like a lot of flavor. For some people, 2-3 cloves of garlic and a pinch of red pepper flakes may due. We're kinda like flavor Vikings...flavor warriors, of sorts, a little over the top... and that's the way we like it. So, drop the garlic and red pepper flakes in the pan, and let it bloom over medium low heat for about a minute. You do not want to burn the garlic, just let it get warm and cozy in all that tasty olive oil and red pepper.
 Next, I dropped my tomatoes into the pan with 1 teaspoon of kosher salt and fresh ground pepper and half a teaspoon of sugar. Mix it all together and smash the tomatoes with the back of your spoon.
 Let the tomatoes cook in that garlicky-peppery hot tub of flavor(about 30-40 minutes on low heat). While the shrimp thaws, you can get the veggies ready.
 Tonight, I actually had fresh broccoli and zucchini... on a Friday... SCORE!! So, we washed and chopped our veggies. As the sauce continues to cook, shell the shrimp and dry it with paper towels and add to a bowl.
 To flavor-up the shrimp, I added about 2 teaspoons of olive oil, salt and pepper, 1 teaspoon of Italian seasoning, and... yup... another 2 cloves of chopped garlic. Mix together and park that marinating shrimp on the counter for about 30 minutes to develop the flavor!
 After the shrimp soaks in all that garlicky flavor, add it to the sauce that you've been cooking. Turn the heat up from low t medium and cook just until the shrimp is pink and the edges curl a bit. Don't overcook or the shrimp will be tough. This will only take a few minutes.
 Cook your pasta according to the package directions. We used plain old thin spaghetti, and it was perfect! I added my veggies to the pasta while it cooked for the last minute of cooking. This way you get them slightly cooked, but still crisp, fresh and full of nutrition. Strain the pasta and the veggies and add to the sauce and shrimp.
 Toss together to coat the pasta and combine all the ingredients! Your house officially smells like an Italian trattoria, and you're about to have a "come to Jesus" moment with a bowl full of garlicky shrimp pasta!!!
 So, here's dinner Joe's way... a big bowl of shrimp pasta full of healthy veggies and topped with some grated cheese! Full of flavor and super hearty and very lean! One happy Gremlin Mom with both... a big-grown man-boy, and middle school boy... in the house... for dinner tonight!! I'll take it!


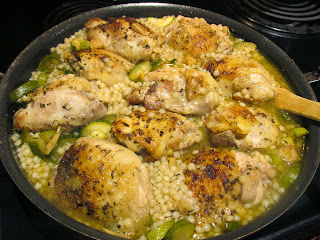
 Sunday chicken dinner with all the comforty goodness of roasted garlic and creamy couscous and zucchini! Soooo good!